
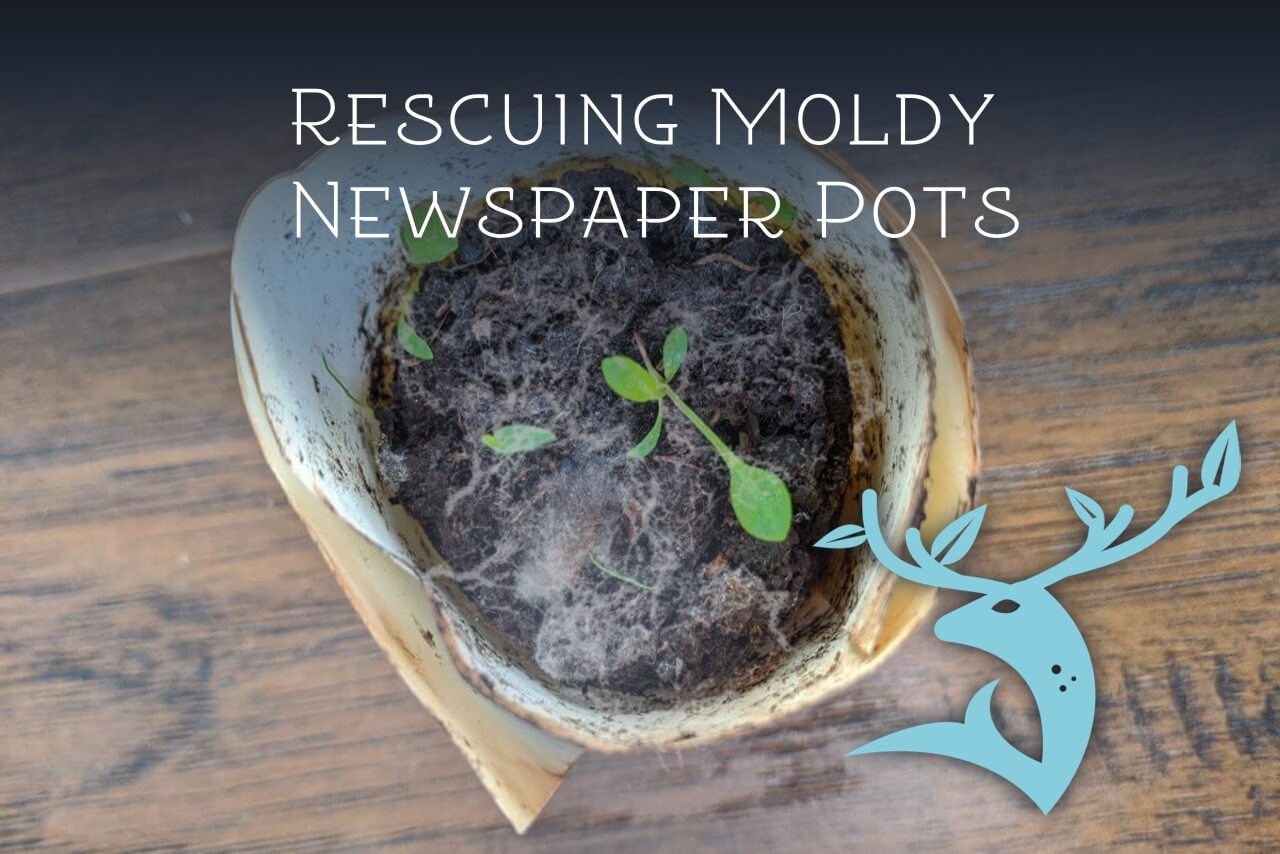
So you love your Pinterest-worthy newspaper seedling pots, but there’s a problem. Mold has shown up, and now you’re wondering if you’ve made a big mistake. Fear not! In most cases, mold does not spell disaster. Your seedlings can survive a small run-in with it, and there are a number of things you can do to discourage its growth.
How To Discourage The Growth of Mold In and On Newspaper Pots
There are four things you can do to start resolving your mold problem right away: water less, separate your pots, add ventilation, and use UV radiation. And here’s a bonus: all of these strategies are also helpful for preparing your seedlings to face the world.
Why Your Newspaper Pots Have Gotten Moldy
Just like every other living thing, mold favours certain conditions that help it thrive. You are creating those conditions if the following are true:

- Your soil is always very damp
- Your pots are touching each other, creating a moist, sheltered space where the mold can grow
- Your seedlings are in a warm space with still air
- Your seedlings are not getting any direct unfiltered sunlight (this will be the case for most gardeners starting seeds indoors)
Water Less
While your seeds are germinating, consistent moisture is important. It’s how you tell the seed, “Wake up! It’s spring!” But once they have put down roots, you don’t want consistently soggy soil. In fact, you should let it get nearly dry before you water again. This helps your plant grow a healthy root system and staves off a fungal condition called “dampening off” that destroys plant roots in too-wet soils.
The great thing about newspaper pots is that you can tell with confidence whether there is still moisture below the soil’s surface: just pick up the pot and feel the bottom. If it’s still pretty damp, leave it alone for a while longer.

When you do give your plants a drink, take advantage of paper’s porous nature and use bottom-watering: put your pots in a tray and pour the water into the tray. The pots will soak up water from their bases, which helps train the roots to keep digging downward. If your pots are all saturated before the water is gone, pour off the excess and remember to use less next time. You’ll get a sense for what the right amount is to dampen your soil without soaking it.
Separate Your Pots
This is an easy fix. Simply move pots apart if they are touching each other. Mold likes the cellulose that paper is made of, and it likes still air and crevices where it can really get a toehold. Pressing two cylinders up against each other creates a nice, cozy nook for mold to move into. Pull them apart to disrupt its happy homemaking.
Add Ventilation
Mold grows best in places with unmoving air—just think of closed-up rooms and mildewy old trunks that are rarely opened. Add a fan to the space where your seedlings are growing and direct a gentle current at them. In addition to mold management, it’s good for your plants to get used to wind before they are transplanted outside. Of course, you should be careful to ease them into it. If you are adding a fan after your seedlings have already sprouted, start by directing it so that the seedlings barely stir. Over the next several days, turn the fan gradually until they are tolerating a greater force of air.

You can also crack a window if this won’t inflict freezing temperatures on your young plants. Mold is comfortable at the same temperatures humans enjoy in their homes—at least 20 degrees Celsius (70 degrees Fahrenheit). Lowering the temperature discourages this fuzzy miscreant and also helps prepare your plants for life in the unpredictable outside world. Teaching them about colder weather now will keep them from being shocked when you begin to harden them off before transplant time.
Use UV Radiation
This strategy can be the quickest-acting, but it takes a careful touch. Mold cannot tolerate UV radiation, so giving it a direct dose of sunlight is satisfyingly lethal. However, your indoor-grown seedlings are not equipped to handle direct sunlight either. They have developed their leaves in response to their low-light conditions, and shocking them with the sun’s full blast will make those leaves turn white and crumbly within a single day. The burnt leaves will never recover.
Here is what I do: I take my seedlings outside into a shaded area for about an hour on a mild day. At some point during that hour I give them two minutes of direct sunlight. Then everybody goes back inside. The next day, they can stay in the shade for up to two hours and get a few more minutes of sunlight. If it’s late enough to be hardening the seedlings off for transplanting outside (a week or two before my region’s last-frost date), then I continue this process for longer and longer doses until they are spending entire days outside.
Now You Know!
If you can use all four of these strategies, you should experience the best results. If not, do what you can. Mold can be alarming, and it certainly shouldn’t be left to run rampant, but you don’t need to panic if you can’t instantly eradicate it. The most important thing is to remember the conditions that make mold thrive, and to change your plants’ environment to reduce those conditions.

Bonus Fact: If you see straight, white threads radiating out from a seed that is sprouting near the surface of your soil, chances are good that you are not looking at mold. Many seeds have fuzzy, white root hairs that emerge early in germination. They will disappear from view as the root burrows into the soil.
◀ This photo shows root hairs, not mold
More Tips for Using Newspaper Pots
- You can buy tools for making cylindrical paper pots quickly, but they aren’t essential. I made mine by wrapping a strip of paper around the flat end of a bottle, overhanging the end by about an inch. I folded the overhanging paper down in small sections, slid the whole thing off the bottle, and folded a small lip inward at the top for extra stability. There are also online tutorials for making folded pots in various shapes.
- Any paper will do as long as it isn’t printed with glossy or inkjet inks, which are not safe when they leach into soils.
- If your soil was too loose when you filled your pot and it sinks low later, trim the top of the pot. You don’t want your seedlings to have to grow a long way to find the best light past the edge of the pot; this makes them leggy, which leaves them weaker for life.
- It’s great that paper is biodegradable, but it doesn’t break down overnight. If you are transplanting into a bigger pot instead of the garden, it will happen very slowly indeed because the creatures who do the decomposing don’t have a strong presence in your potting soil. In order to let your plant take advantage of its roomier new quarters, tear away the newspaper pot’s bottom (give it a nice drink first so that it tears easily without harming the roots). I also like to tear off the strip of paper that sticks up above the soil since it could cause the whole plant to be uprooted if something catches on it. In fact, I often peel off the pot entirely unless the roots have dug right into the paper.